Friday, December 31

ten, nine, eight, seven, six. . .

Lose weight! Take the Special K Challenge! Watch The Biggest Loser! Make last-minute tax moves on December 31!

Blah, blah, blah.

Yes, I could stand to lose a few after the 12 Days of Christmas Cookies (what was I thinking?) and I'm always looking to save some $$$. But the HYPE! It gets old fast, plus I don't need to hear it from everybody and their brother.

Instead of focusing on the gloom and doom of the past year - upon which mainstream media did not depend until the late 80s - or making New Year's resolutions I am unlikely to keep, below are some bright spots in 2010.
  1. Republicans didn't take EVERY seat in Congress
  2. The Girl Who Kicked The Hornet's Nest
  3. iPad
  4. Waiting for Superman
  5. Rescue of 33 Chilean miners 
  6. US Government officially declared an end to the "combat" in Iraq
  7. Sarah Shourd - one of 3 American hikers accused of espionage in Iran - was released
  8. Nobel Peace Prize was awarded to Liu Xiaobo for his 20+ years working for human rights in China
  9. Lady Gaga took off the meat dress
  10. Early studies suggest AIDS drugs lower the risk of HIV infection
Now I will resort to the cliché and wish you a Happy New Year. But it's heartfelt nonetheless.

Monday, December 27

After Christmas Fun

Yesterday the fam went up to Rocky Mountain National Park to sled. There were tons of people on the hill; it looked like a bad 70s movie. It was really fun but cold, cold, cold! We tailgaited aprés sled with hot chocolate and homemade marshmallows. Delish but too cold to stand outside and boil the water. Always an adventure, though.


I realize I owe my final recipe for the 12 Days of Christmas Cookies/Treats. On Christmas Eve, I completed the journey with a fudge recipe from the marshmallow bag. Thank God we've reached the end. My thighs say, "NO!"


Easy Fudge

2 tablespoons butter
⅔ cup evaporated mile
1¾ cups sugar
¼ teaspoon salt
2½ cups miniature marshmallows
1½ cups semi-sweet chocolate chips
1 cup chopped walnuts (optional)
1 teaspoon vanilla

  1. Combine butter, milk, sugar and salt in a medium saucepan; bring to a boil over medium heat.
  2. Boil for 4-5 minutes, stirring.
  3. Remove from heat; stir in marshmallows, chocolate chips, walnuts and vanilla.
  4. Stir vigorously until chocolate chips and marshmallows are melted.
  5. Pour into a foil-lined or buttered 8x8 baking pan.
  6. Sprinkle with additional walnuts if desired.
  7. Chill until firm.

Happy Holidays!

Friday, December 24

What's the Big Deal about Baking at High Altitude?

Travels sent an interesting question to me the other day:

I am at altitude and don't ever change the recipes in cookbooks. I noticed you mention this cookbook in other posts. Could you tell me basically what is different when baking at altitude? What you need to consider changing and why?


After growing up at sea level, baking at high altitude has been a disaster for me. Pure and simple. The cakes, muffins and cookies I've tried have turned out dry, flat and pathetic. That's why Pie in the Sky was such a revelation for me.

Before I moved to high altitude, various people told me to add a couple of extra tablespoons of flour and call it good. Um, yeah. Wish that had worked. So, what's the big deal (other than the fact that MY recipes didn't work)?

As it turns out, it wasn't really my fault; it has more to do with changes in atmosphere and humidity than poor baking skills. It's chemistry, baby.

In one of the early sections of her book, Susan G. Purdy dispells 12 myths about high altitude baking:

Myth #1 - Always substitute extra-large eggs for large or medium eggs in sea-level recipes
Myth #2 - At higher altitudes, add extra flour to all baked goods
Myth #3 - Always cut the leavening as altitude increases
Myth #4 - Cut out the baking soda at high altitudes
Myth #5 - Reduce the fat in rich cakes and cookies at high elevations
Myth #6 - Always raise the oven temperature by 25 degrees at high altitudes
Myth #7 - When using a glass baking dish, always reduce the oven temperature by 25 degrees
Myth #8 - Batter will overflow in cake pans at high altitude
Myth #9 - Cookie recipes don't need adjustment at high altitude
Myth #10 - Pie crusts don't need adjustment because they are not affected by high altitudes
Myth #11 - Pie fillings don't need adjustment because they are not affected by high altitude
Myth #12 - When using boxed mixes, you can count on their high altitude directions to work every time

Once you've read through the myths, though, there are still no hard and fast rules. Sometimes you raise the temperature; sometimes you lower it. You omit the baking soda to maintain acidity; or not. Substitute buttermilk for whole milk; sometimes.

Most resources recommend experimentation. Joy of Cooking has a special section and lays out some high altitude baking/cooking rules then sets you off on your own. Since I don't have the patience for that kind of thing, Pie in the Sky is the book for me. Purdy has already done all of the experimenting for me and her recipes work. I have nothing more to do than open the book, select a recipe and get to it. 

I wish that all of my sea-level recipes worked at altitude, but I just can't seem to pull it off. Travels, I'm jealous that you don't have to alter yours!


Thursday, December 23

12 Days of Christmas Cookies - Day 11

When we made gingerbread houses yesterday, I got a double bonus. The boys' mom is one of my dear friends and we had time to visit while the kids worked on their houses. She also brought a gluten-free cookie recipe we whipped up together. They turned out great!


Peanut Butter Kiss Cookies (gluten-free)
Makes 4 (2-inch) cookies

Hershey kisses
½ cup butter 
¾ cup peanut butter
 cup brown sugar
 cup white sugar
1 egg
2 tablespoons milk
1 teaspoon vanilla
1½ cup gluten-free flour mix 
½ teaspoon xanthan gum
1 teaspoon baking soda
½ teaspoon salt
granulated sugar
  1. Preheat oven to 375 degrees.
  2. Cream butter and peanut butter until smooth. Add sugars and mix until combined and fluffy. 
  3. Add egg, milk and vanilla; stir until combined. 
  4. Mix flour, xanthan gum, baking soda and salt. Stir into peanut butter mix. 
  5. Form into balls and roll in granulated sugar. Bake 8-10 minutes. 
  6. When cookies come out of the oven, immediately press unwrapped kisses into the center of each cookie. 
  7. Remove to a rack and let cool. 

12 Days of Christmas Cookies - Day 10

Yesterday one of Roo's classmates and his two little brothers came over to make gingerbread houses. Wow, they came up with some great designs. Several attempts were made at gabled roofs but no dice. Some pretty clever solutions, though.

Raising the walls
The 3-year-old's creation. When I said I liked the gummy bear forest,
he informed me that it was a hockey game.
Roo's buddy's house.
Roo's house. Notice the power line on the toothpicks.
The 4-year-old's design. I love the flat roof and 50s vibe.
Last, but not least, the Diva's.

Tuesday, December 21

12 Days of Christmas Cookies - Day 9

Mexican Wedding Cookies, aka Russian Tea Cakes, are my favorite cookies, hands down. Luckily I found a high altitude recipe in Pie in the Sky that works like a charm.


Mexican Wedding Cookies
Makes about 40 (1-inch diameter) cookies
Recipe for 5,000 feet

½ pound butter
2½ cups sifted cake or all-purpose flour
½ cup sifted confectioners' sugar
½ generous teaspoon salt
1 cup finely chopped walnuts, almonds or pecans
2 teaspoons vanilla extract
¾ teaspoon almond extract
sifted confectioners' sugar for rolling and storing cookies

  1. Preheat oven to 350 degrees and divide oven into thirds. Line cookie sheets with parchment paper or leave ungreased.
  2. In a large bowl of an electric mixer, preferably with a paddle attachment, beat the butter until creamy and smooth. Gradually beat in flour, sifted confectioners' sugar, salt, nuts and extracts.
  3. With lightly floured fingers, pinch off small lumps of dough and roll them between your palms into balls about 1 inch in diameter, then set them on prepared cookie sheet about 1 inch apart.
  4. Bake the cookies for 15-20 minutes, or just until the tops are a pale golden color; don't let them get too brown.
  5. When cookies come out of the oven, set the pan on a wire rack and cool 4-5 minutes. While cookies are still warm, roll in sifted confectioners' sugar to coat well. Set on waxed paper to cool completely.
  6. Store the cooled cookies in an airtight container, layered with additional sifted confectioners' sugar.

They're not perfectly coated or ready for their close-up, but they melt in your mouth nonetheless. Delish.

Monday, December 20

12 Days of Christmas Cookies - Days 7 and 8

Goin' old school. . .


Magic Cookie Bars
Makes 24 bars

1½ cups graham cracker crumbs
½ cup butter, melted
1 can (14 oz) sweetened condensed milk
12 oz package semi-sweet chocolate chips
1⅓ cups flaked coconut
1 cup chopped nuts

  1. Preheat over to 350 degrees. Spray 13x9-inch pan with nonstick cooking spray.
  2. Combine graham cracker crumbs and butter in a small bowl. Press into bottom of prepared pan.
  3. Pour sweetened condensed milk evenly over crumb mixture. 
  4. Layer evenly with chocolate chips, coconut and nuts.
  5. Bake for 25-30 minutes until lightly brown.
  6. Loosen from sides of pan while still warm, cool on a wire rack. Cut into bars or diamonds.

A newbie, too. . .


Drop-and-Bake Lace Cookies
Makes 36 cookies

4 tablespoons unsalted butter
¼ cup granulated sugar
¼ cup packed light brown sugar
2 tablespoons heavy cream
⅓ cup very finely chopped pecans
¼ cup all-purpose flour, spooned and leveled
¼ teaspoon kosher salt

  1. Preheat oven to 350 degrees. In a small saucepan, combine butter, sugars and cream and bring to a boil. Boil, stirring until the sugar dissolves, about 1 minute. Remove from heat and stir in the pecans, flour and salt.
  2. Drop level teaspoons of the warm batter, spacing them 4 inches apart, onto parchment-lined baking sheets. If the batter cools between batches and can't be scooped, rewarm it slightly.
  3. Bake, rotating the sheets halfway through, until golden brown, 8-10 minutes. Cool on the sheets until firm, about 5 minutes. Transfer to wire racks to cool completely.

Phew! I'm finally caught up.

Sunday, December 19

12 Days of Christmas Cookies/Treats - Days 5 and 6

Roo and I have been down for the count for a couple of days and I'm incredibly behind in my cookie, candy and treat efforts. Plus, the Diva has been at sleepovers two nights in a row and couldn't pick up the slack. She cleaned the kitchen for me, though, between her social engagements, and it was a huge help. Since I've been sick, I haven't been able to even look at food. So here's to catching up on lost time.


Peppermint Bark
Makes 24 (2-inch) pieces

1 bag semi-sweet chocolate chips
1 cup crushed candy canes
  1. Melt chocolate chips in a double boiler over low heat.
  2. Spread melted chocolate evenly into an 8 x 8 inch pan.
  3. Sprinkle candy over chocolate (quick tip: sift crushed candy through a fine sieve to remove the powder).
  4. Let cool two hours in the refrigerator.
  5. Break into bite-size pieces and enjoy.
  6. Bark will keep in an airtight container in the fridge for two weeks.


Marshmallows
Makes 20 large marshmallows

Nonstick cooking spray
2 envelopes unflavored gelatin (4¼ teaspoons)
¾ cup cold water
2 cups granulated sugar
⅔ cup light corn syrup
⅓ cup refrigerated egg white product or 2 pasteurized egg whites
¼ teaspoon salt
1 teaspoon vanilla
3 tablespoons cornstarch
⅔ cup powdered sugar

  1. Lightly coat an 8x8x2-inch baking pan with nonstick cooking spray. Line pan with plastic wrap, or line bottom of pan with waxed paper or parchment paper. Coat the plastic or paper with nonstick cooking spray; set pan aside.
  2. In a large metal or heatproof bowl sprinkle gelatin over ½ cup cold water; set aside.
  3. In a 2-quart heavy saucepan stir together remaining ¼ cup water,1¾  cups of the sugar, and the corn syrup until combined. Bring to boiling over medium-high heat. Clip a candy thermometer to the side of the saucepan. Cook without stirring, over medium-high heat until the thermometer registers 260 degrees, 12-15 minutes.
  4. Remove from heat; pour over gelatin mixture in bowl and stir well to combine (mixture will foam up).
  5. Meanwhile, in a large mixing bowl beat the egg whites and salt with an electric mixer on high speed until foamy. Gradually add remaining ¼ cup sugar, 1 tablespoon at a time, until stiff peaks form, 3-4 minutes. Beat in vanilla until combined. 
  6. With the mixer running on high speed, gradually add gelatin mixture to egg white mixture, beating about 7 minutes or until thick (like the consistency of thick, pourable cake batter). 
  7. Quickly pour marshmallow mixture into prepared pan, spreading to edges of pan. Lightly coat another piece of plastic wrap with nonstick cooking spray; place, coated side down over marshmallow mixture. Let stand at room temperature for 1 to 2 hours or until firm.
  8. Remove plastic wrap from top of marshmallow. In a small bowl combine powdered sugar and cornstarch. Sprinkle ¼ of the mixture onto a large cutting board. Loosen sides of marshmallows and invert onto cutting board. Sprinkle the top with some of the remaining powdered sugar mixture. Using a knife that's been dipped in warm water, cut into 20 marshmallows. Place remaining powdered sugar mixture and a few marshmallows at a time into a resealable plastic bag and toss until coated.
  9. Store marshmallows between sheets of waxed paper or parchment paper in an airtight container in the refrigerator up to 1 week. Or freeze up to 1 month. Bring to room temperature before serving.

Thursday, December 16

12 Days of Christmas Cookies - Day 4

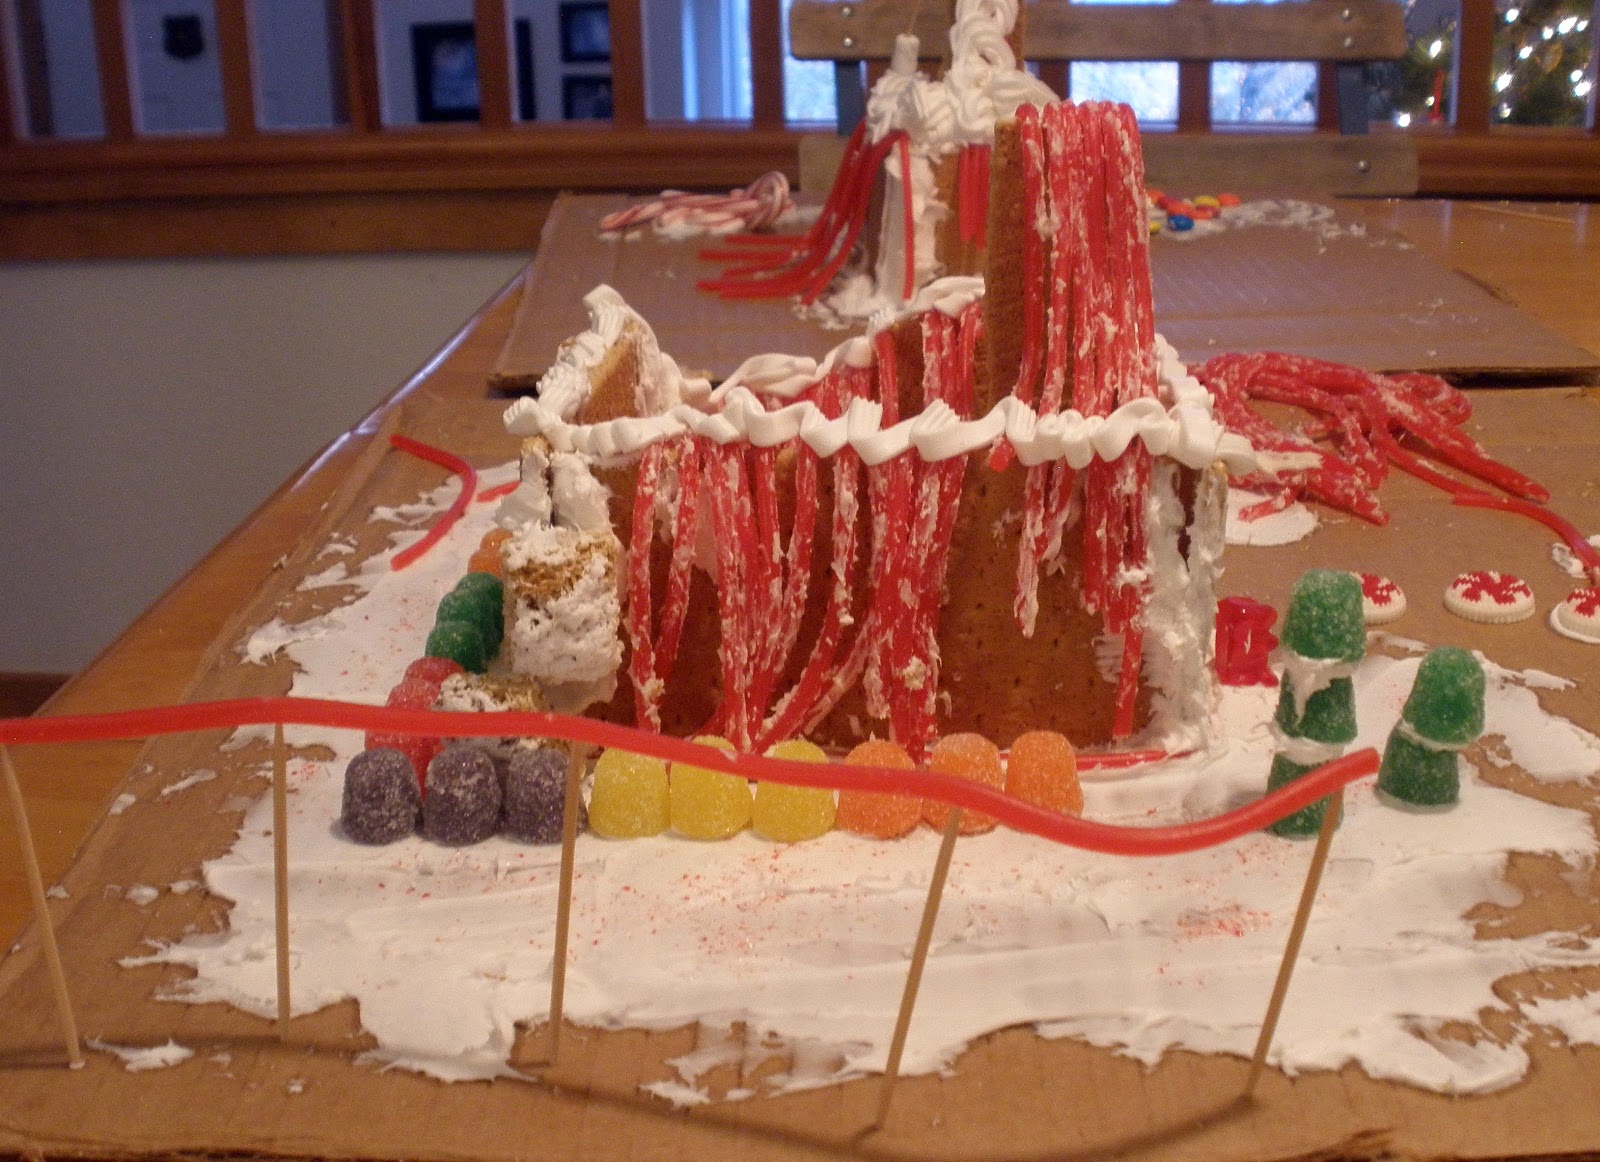
Hopefully you enjoyed (and/or endured) my foray into Wordless Wednesday. I didn't make this up; it's a practice that's somewhat common in the blogoshpere. On Wednesdays you post a photo that speaks for itself and leave it at that.

Yesterday's cookie was Chocolate-Cranberry Oatmeal Cookies, from Pie in the Sky.


Trout Dale Oatmeal-Raisin Cookies
[Recipe for 5,000 feet]

Makes 55 cookies (2-inch diameter)

Line cookie sheets with baking parchment, nonstick baking mats or lightly coat with butter.

Rack in center of oven; bake at 350 degrees for 13-15 minutes.

1½ cups plus 1½ tablespoons all-purpose flour
Generous ¼ teaspoon baking soda
Generous 1 teaspoon salt
½ teaspoon ground cinnamon
½ pound unsalted butter at room temperature
¾ cup granulated sugar
½ cup dark brown sugar, packed
2 large eggs at room temperature
1½ teaspoons vanilla extract
3 cups old-fashioned rolled oats
1 cup raisins (optional)
  1. In a medium bowl, whisk together the flour, baking soda, salt and cinnamon.
  2. In a large bowl using a sturdy spoon or an electric mixer, preferably with the paddle attachment, beat the butter until soft and creamy, then beat in both sugars. Scrape down the bowl and beater, if using, and beat until smooth. Beat in the eggs and vanilla, and scrape down the bowl again.
  3. Stirring slowly, or with the mixer on the lowest speed, gradually work in the flour mixture then the oats and any mix-ins. The dough will feel very stiff.
  4. Drop the dough onto cookie sheets by heaping tablespoon, places cookies 2 inches apart. Bake for the time indicated or until the cookies are golden brown, the longer they bake, the crisper they will be.
  5. Cool cookies on a wire rack. When the cookies are completely cool, store them in an airtight container.

I modified the recipe and added 1 cup dried cranberries and 1 cup chocolate chips rather than raisins.

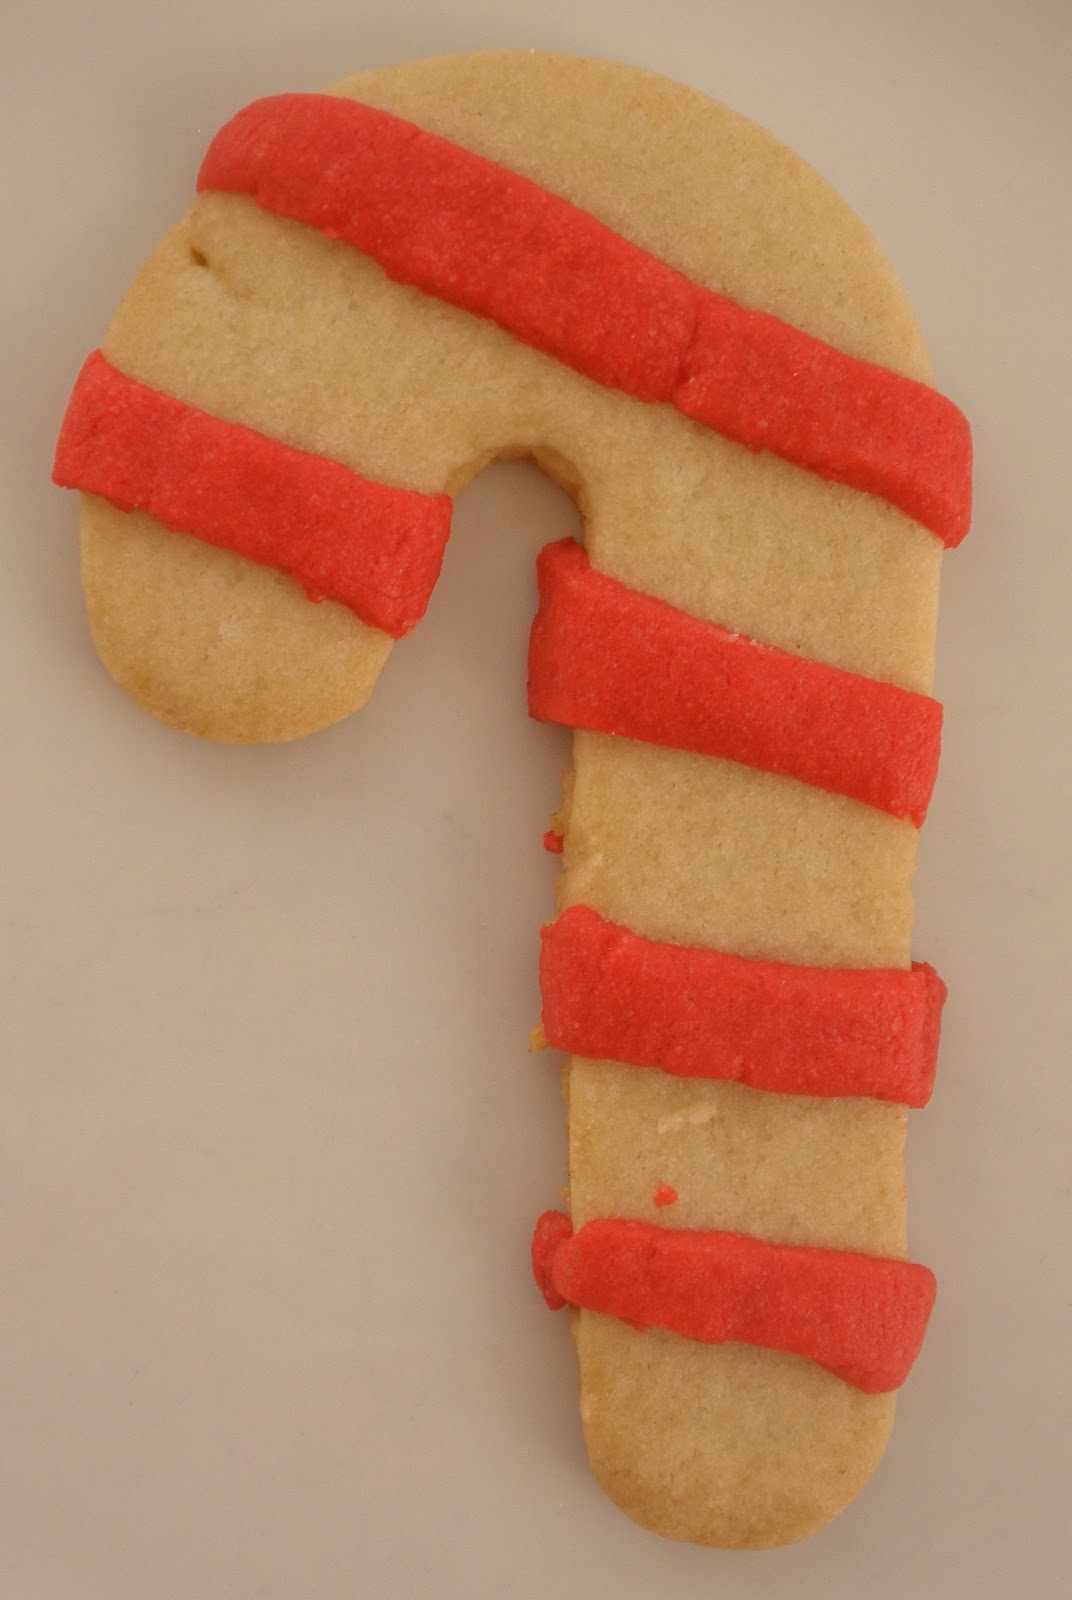
Today's cookie is another sugar cookie, published in the December 2010 issue of Country Living.

Basic Sugar-Cookie Dough

Makes 24 cookies

Line cookie sheets with baking parchment, nonstick baking mats or lightly coat with butter.

Rack in center of oven; bake at 350 degrees for 8-10 minutes.

1 stick unsalted butter at room temperature
1½ cups confectioners sugar
2 large eggs
1 teaspoon vanilla extract
¼ teaspoon salt
2½ cups all-purpose flour


  1. In a large bowl, beat together butter and sugar using an electric mixer at medium-high speed.
  2. Add eggs, vanilla and salt, beat until combined. Reduce mixer speed to low, add flour and mix until smooth.  


We added red food color to ¼ of the dough to decorate candy cane shaped cookies. Roll dough to ¼-inch thick and use cookie cutters to shape, and decorate. Bake as directed.


A couple of Roo's friends - Doodle and Rabbit - came over to help decorate.


They started in a very traditional mode, then went all Picasso on them. 


The unusual shade of gray is the result of mixing the red and green sugars into the vanilla frosting. Doesn't look very appetizing to me, but, according to the kids, they tasted good.

Tuesday, December 14

12 Days of Christmas Cookies- Day 2

Baking at high altitude isn't the easiest. Well, no. It pretty much stinks.

When we first moved to the mountain states seven years ago, from sea level no less, I quickly learned that baking was going to be a whole new ball game. I tried baking a batch of Toll House cookies and couldn't believe the results. They were completely flat and far too crispy. How can you bomb Toll House cookies?

Refusing to accept defeat, I set out to find a decent high altitude baking book. The recipes in the first book I purchased didn't work very well. A huge disappointment.

I moved on to other books until I found one that turned the whole thing around. Pie in the Sky - Successful Baking at High Altitudes is the best.


The author, Susan G. Purdy, is a baking teacher, journalist and author of 30 books. What I especially like about the book, - in addition to the fact that the recipes work - is that all of the recipes were tested in home kitchens at sea level, 3,000 feet, 5,000 feet, 7,000 feet and 10,000 feet. How comprehensive is that?

You may have guessed that today's recipe is from Pie in the Sky. The cookies turned out beautifully, made by the Diva entirely by herself. We used the instructions for 5,000 feet, which I've included below.

Old-Fashioned Sugar Cookies

Makes 50 cookies (2-inch) diameter

Line cookie sheets with baking parchment, nonstick baking mats or lightly coat with butter.

Divide oven into thirds; bake at 350 degrees for 8-12 minutes.

12 tablespoons (1 and a half sticks) unsalted butter at room temperature
1 cup granulated sugar
2 large eggs at room temperature
2 teaspoons vanilla or almond extract
2 and three-quarters cup all-purpose flour
three-quarter teaspoons baking powder
1 teaspoon salt

  1. In a large bowl of an electric mixer, preferably with a paddle attachment, cream the butter and sugar until well blended. Beat in the eggs and vanilla, then scrape down the bowl and beater. Remove bowl from mixer stand.
  2. Place a sifter over the bowl and measure the flour, baking powder and salt into it. Stir/sift the dry ingredients onto the egg mixture, then beat with a sturdy spoon or the mixer at lowest speed until well incorporated. Form the dough into a ball. If it feels too sticky, add 1 or 2 tablespoons of flour, until it is easier to handle.
  3. Work with about a third to one-half of the dough at a time and keep the rest in the refrigerator. Using a lightly floured rolling pin, roll dough to one-eighth inch thick on parchment or baking mat. Dip cookie cutters in flour to prevent sticking, then cut shapes. 
  4. Bake the cookies for 8-12 minutes. Cool on a wire rack.


The Diva chose to sandwich chocolate filling between the cookies. Yum!


Monday, December 13

12 Days of Christmas Cookies/Treats - Day 1

It's time for the parade of cookies. Luckily the Diva is helping; we've got a lot going on this week. Concerts at school, swimming, Christmas parties. The days fill up pretty quickly.

Our first recipe is for Chewy Molasses-Spice Cookies. They turned out great!


Makes 36
  • 2 cups all-purpose flour (spooned and leveled)
  • 1 1/2 teaspoons baking soda
  • 1 teaspoon ground cinnamon
  • 1/2 teaspoon ground nutmeg
  • 1/2 teaspoon salt
  • 1 1/2 cups sugar
  • 3/4 cup (1 1/2 sticks) unsalted butter, softened
  • 1 large egg
  • 1/4 cup molasses

Directions

  1. Preheat oven to 350 degrees. In a medium bowl, whisk together flour, baking soda, cinnamon, nutmeg, and salt. In a shallow bowl, place 1/2 cup sugar; set aside.
  2. With an electric mixer, beat butter and remaining cup of sugar until combined. Beat in egg and then molasses until combined. Reduce speed to low; gradually mix in dry ingredients, just until a dough forms.
  3. Pinch off and roll dough into balls, each equal to 1 tablespoon. Roll balls in reserved sugar to coat.
  4. Arrange balls on baking sheets, about 3 inches apart. Bake, one sheet at a time, until edges of cookies are just firm, 10 to 15 minutes (cookies can be baked two sheets at a time, but they will not crackle uniformly). Cool 1 minute on baking sheets; transfer to racks to cool completely. Store in an airtight container up to 4 days.
Read more at Marthastewart.com: Chewy Molasses-Spice Cookies - Martha Stewart Recipes 

Sunday, December 12

12 Days of Christmas Crafts - Day 12

The 12th day of the 12 Days of Christmas Crafts. I have to admit it's a bit of a relief; I need to move on to other Christmas preparations. It's another knitting project. Very crafty, quick and it makes a great gift.


Simple Mohair Scarf
A skein of mohair yarn
Size 15 needles
Finished size 4" x 72"

Cast on 16 stitches (or the number needed to make the scarf your desired witdth).
Knit every row until you reach the desired length.
It's a light and airy scarf you can wear any time of year.

That's it. Really easy.

Don't forget - the parade of cookies starts tomorrow.

Saturday, December 11

12 Days of Christmas Crafts - Day 11

Today I'm sharing nostalgic ornaments from my childhood. I've always loved these small figures; ever since my mother bought them at a holiday bazaar at St. Michael's Church in Olympia. She knew how much I loved them, so she gave them to me the first Christmas in my first home.


They are teeny tiny, only 2.25 inches high, made from felt, corduroy, and satin.


The detail is beautiful. I'm not sure I could make anything so small and if I did, it wouldn't look nearly as good.

Very special and adorable.

Friday, December 10

12 Days of Christmas Crafts - Day 10

Today's craft is an origami ninja star. Doesn't sound very Christmas-y does it? No judgement until you see it.

The Diva - she's the origami expert - and I used a lightweight wrapping paper of silver snowflakes. Trés thrifty.


You need 2 sheets of 6" x 6" paper. Don't go smaller, it will be nearly impossible to fold. Go bigger if you like, though; just make sure your sheets are square.

We used instructions from The Joy of Origami, by Margaret Van Sicklen.


Carefully fold your first sheet:


Time for the second sheet:


Now it's time to put both of the pieces together:


Word to the wise - take your time and follow the instructions to a T. Even the experienced origami girl had to try this a couple of times.

The end result:


Fun to tuck into the branches of the tree, string into a garland or use as a tag on a gift.

My apologies that some of the photos are blurry and the colors are inconsistent. Argh.